![]()
Web control panel template
v1.0.2
Table of contents
- Overview
- Versions
- Source code files
- Principles of operation
- Build ApplicationTemplate
- Web Page Build Guide
- HTTP API Documentation
- Parameters Configuration
- File Viewer Installation
- Limited Access User
- UI Branding Customization
- External control protocol
Overview
The WebControlPanelTemplate is a template for embedded WEB control page devices. The template includes everything to build embedded WEB control interface for camera. This template can be modified by user with additional parameters and functions. It includes WEB server application (WebControlPanel) and C++ application (ApplicationTemplate). The WebControlPanel is an addon to Linux Cockpit systemd service. The WebControlWeb repository provides the web-based user interface and integration scripts for the WebControl system, designed to work with the Cockpit web console. It enables configuration, monitoring, and control of the WebControl application running on the device, utilizing HTTPS communication. The structure of this repository allows you to maintain user tabs or features and customize the UI branding. The Linux Cockpit provides all necessary infrastructure for camera WEB control interface including file viewer, terminal etc. It is highly customizable and has lots of addons to serve as a base for camera control WEB interface. The template provides to the Linux Cockpit with custom web pages with video display and custom video processing pipeline parameters control. The WEB Control Page Template provides secure HTTPS connection, user management, services managements, updates management, file viewer, on-WEB system terminal and custom parameters control. The WebControlPanel establishes HTTPS connection to ApplicationTemplate to request configuration and send control commands. It is template for camera embedded application. The ApplicationTemplate application is video processing pipeline implementation with RTSP / WebRTC video server and external UDP control interface. It provides video streams and video processing with several functional modules from RapidPixel SDK. The WebControlPanel depends on Linux Cockpit installation and some libraries for WEB project compilation. The project leverages popular open-source libraries and tools, including Vite for fast frontend builds, React for UI development, and cockpit-navigator for file management. All configuration and customization options are documented in this repository. The ApplicationTemplate is an implementation of video processing pipeline and depends on the libraries: VPipeline (video processing pipeline infrastructure), CppHttpLib (provides an HTTP/HTTPS server required communication with WEB server, MIT license), ColorProcessor (brightness, contrast, saturation etc. correction), Dehazer (fog removal filter), Denoiser (noise removal filter), DigitalZoom (digital zoom), ImageFlip (image flip filter), GasLeakDetector (motion magnification filter), CvTracker (video tracker), Gmd (motion detector), Ged (changes detector), VStabiliserCv (video stabilizer), VStreamerMediaMtx (video server), VCodecLibav (video codec based on ffmpeg, linked, LGPL license).
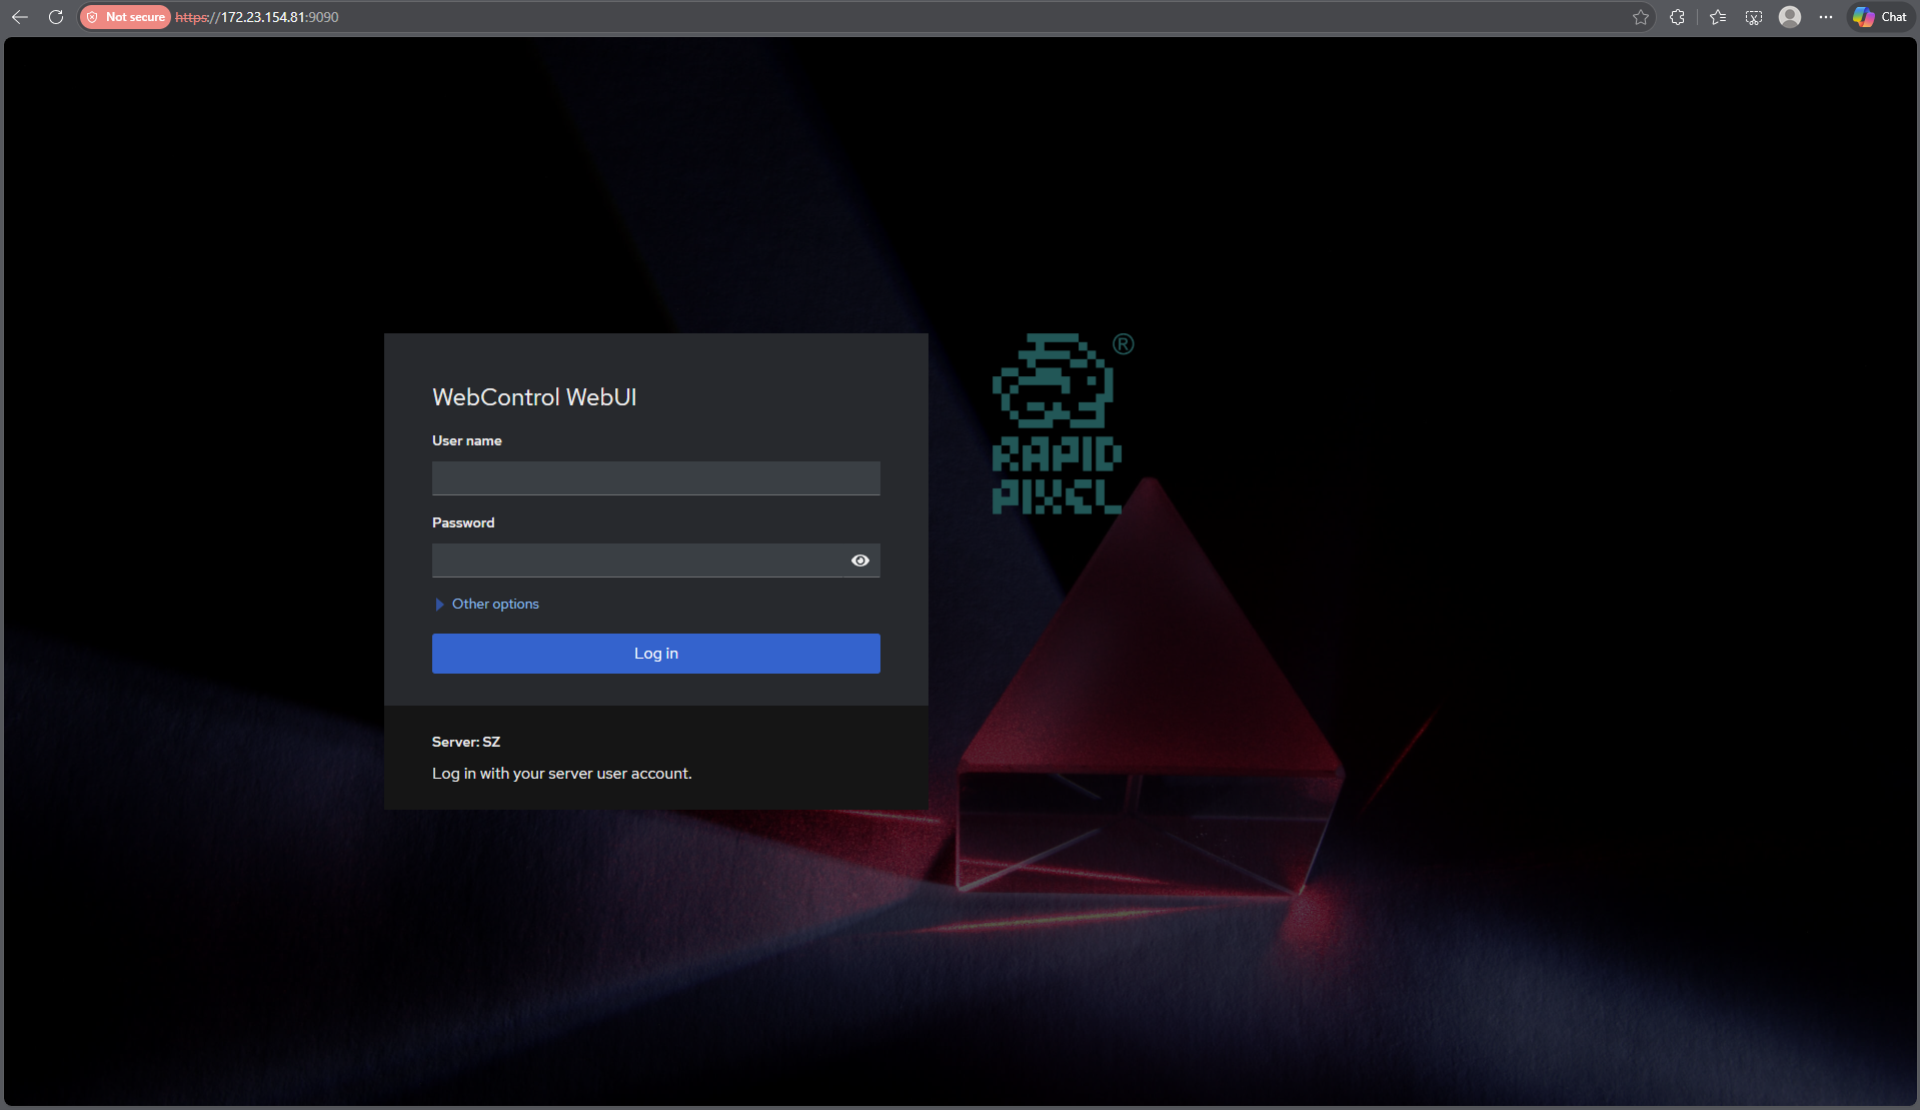
Default login page
The login page uses system users and passwords and provides HTTPS connection.
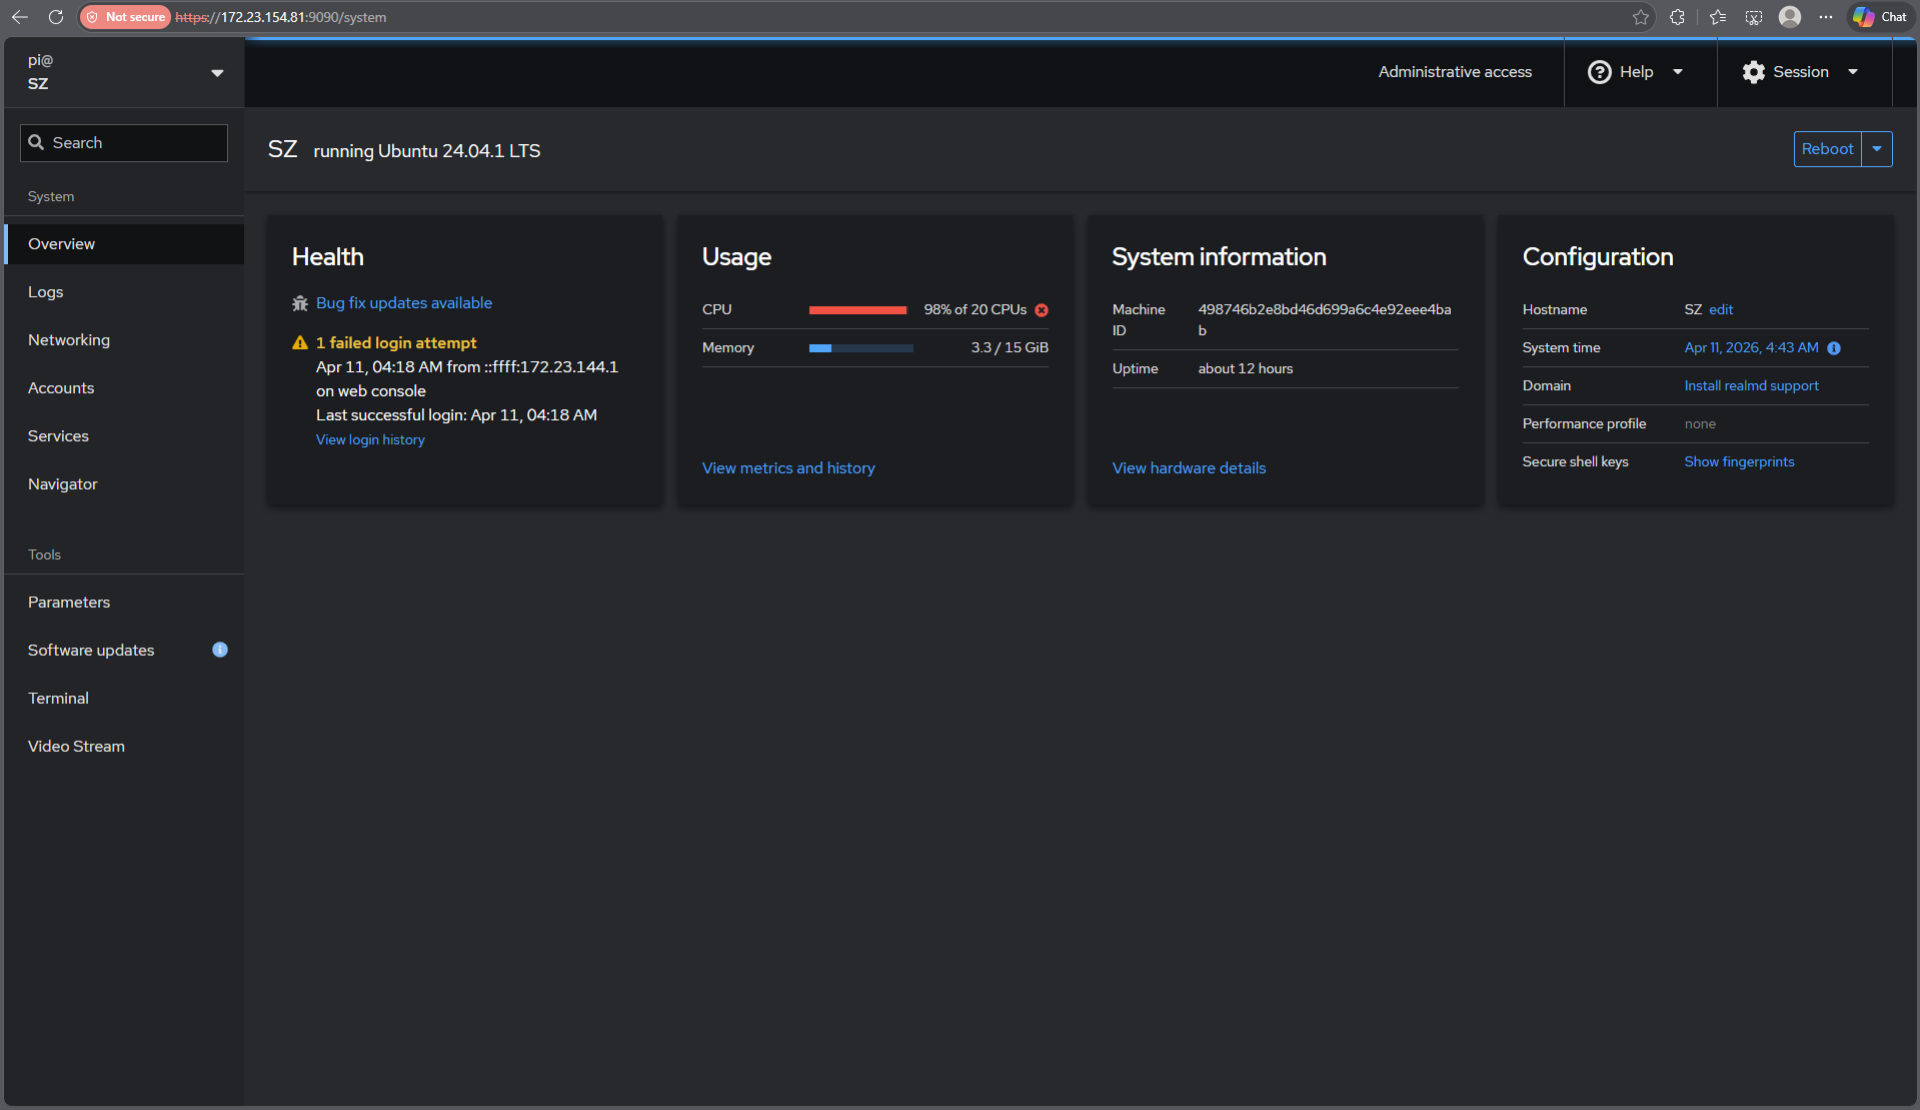
Default system info page
System information WEB page provides information of CPU and Memory usage. This page can be hidden for particular users.
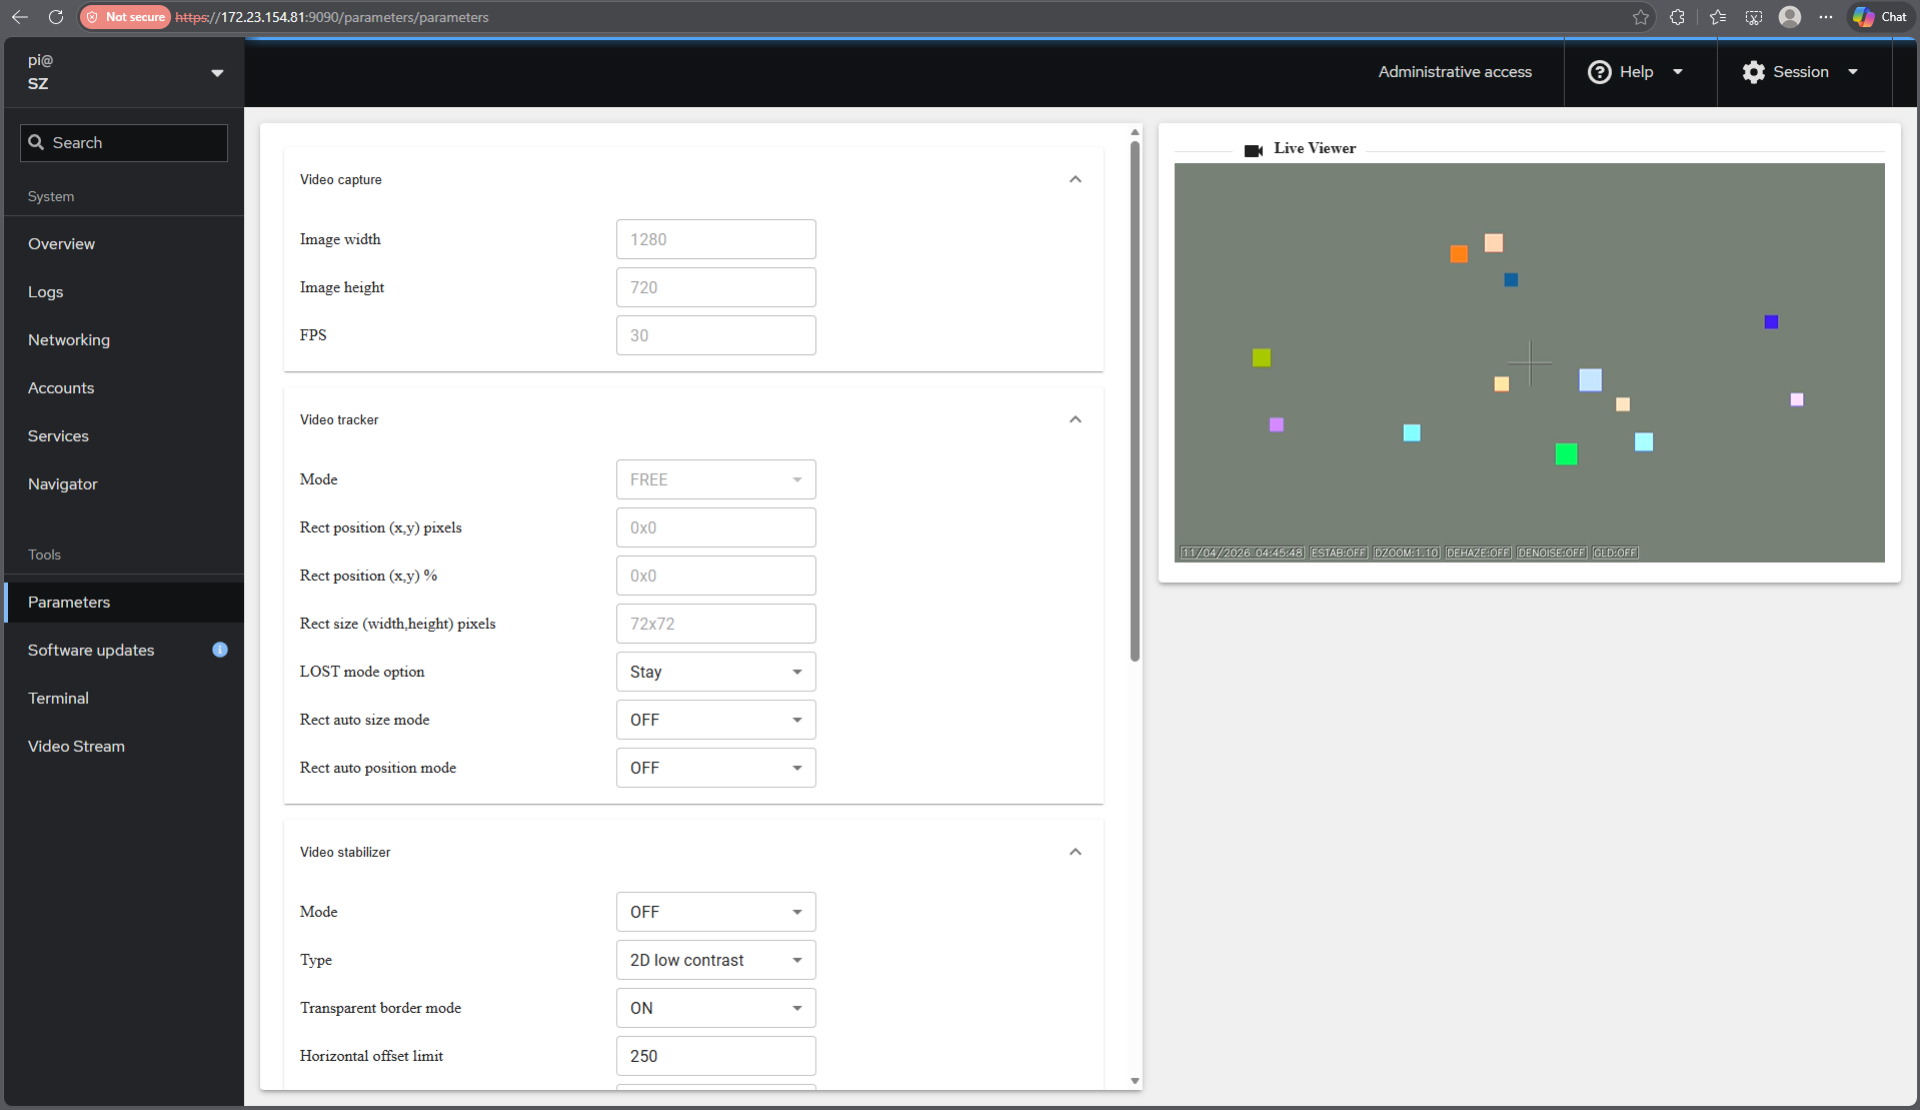
Default custom parameters page
Custom WEB page is addon to Linux Cockpit and provides control parameters for video processing pipeline and video server. It can be changed as the user wants.
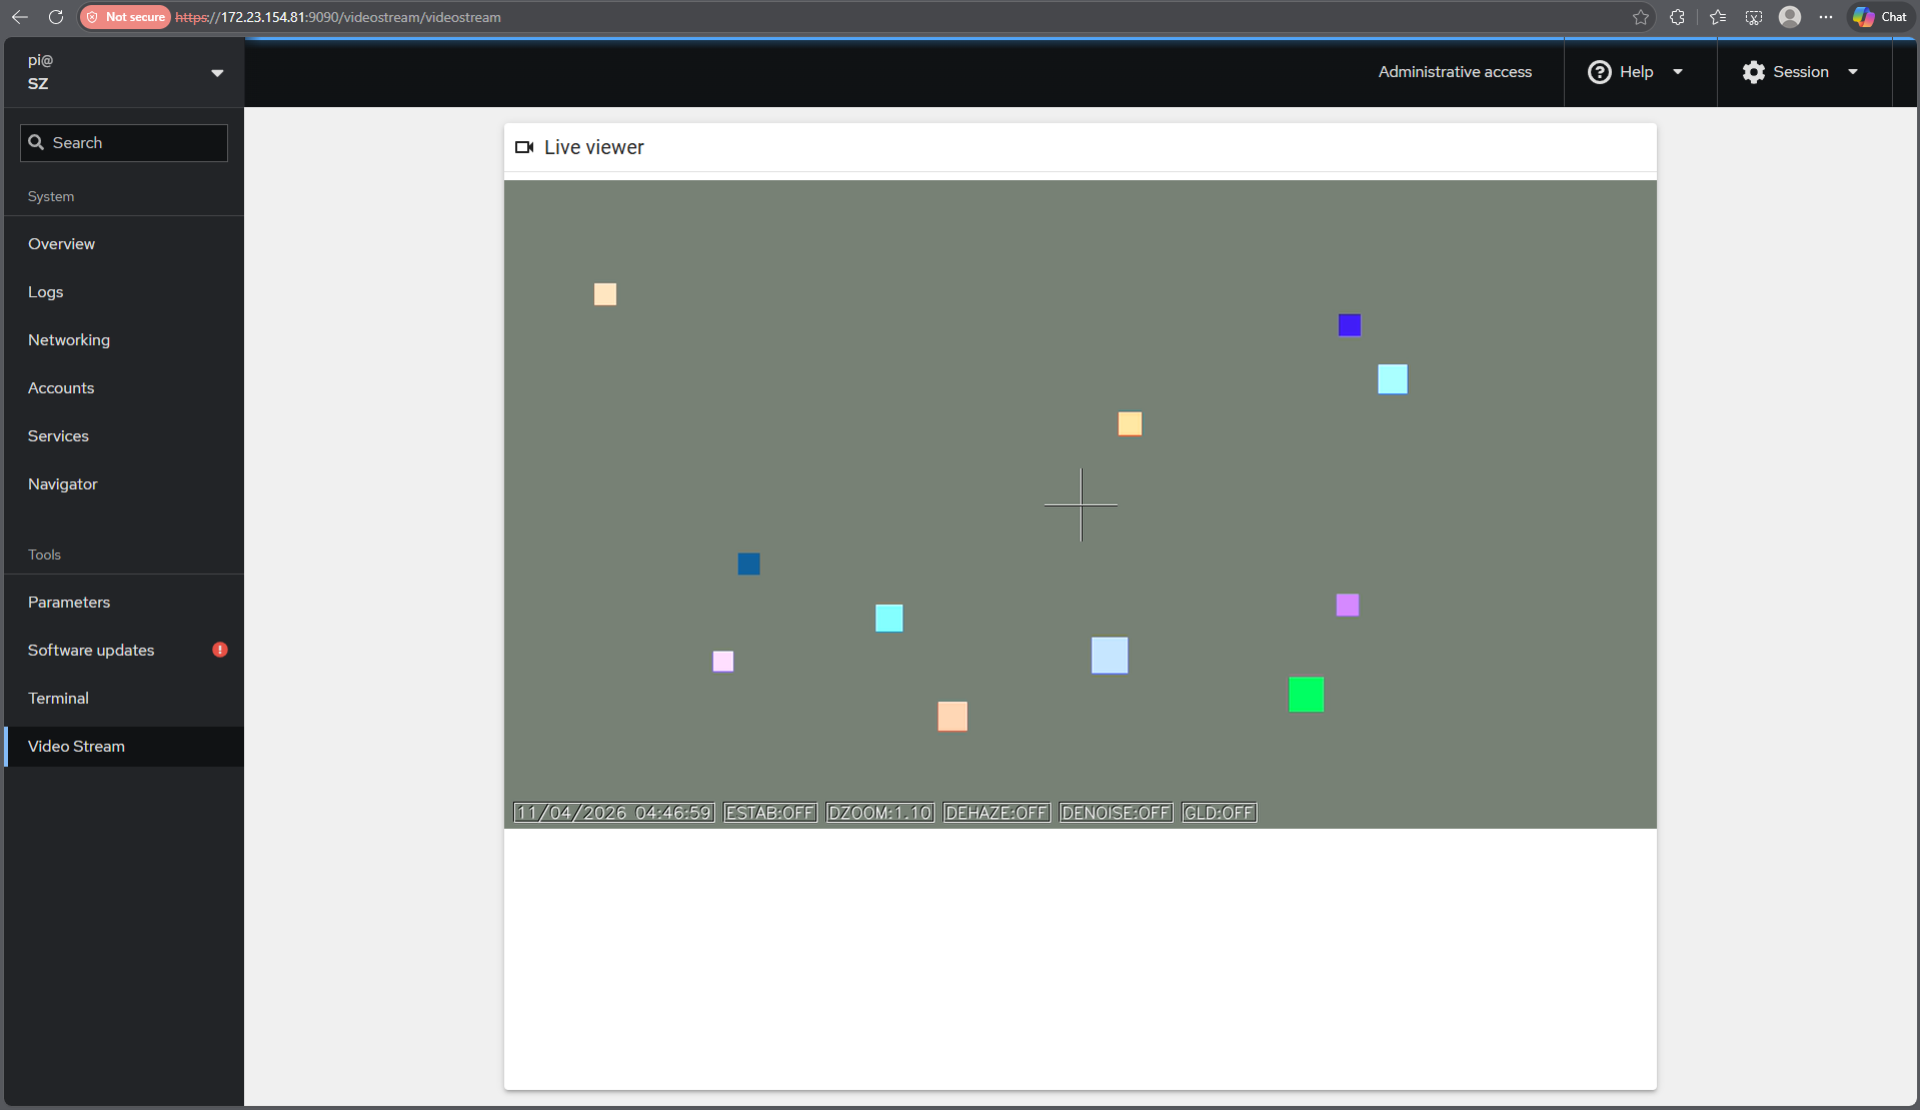
Default video display page
Custom WEB page to display video is also addon to Linux Cockpit. It can be changed as the user wants.
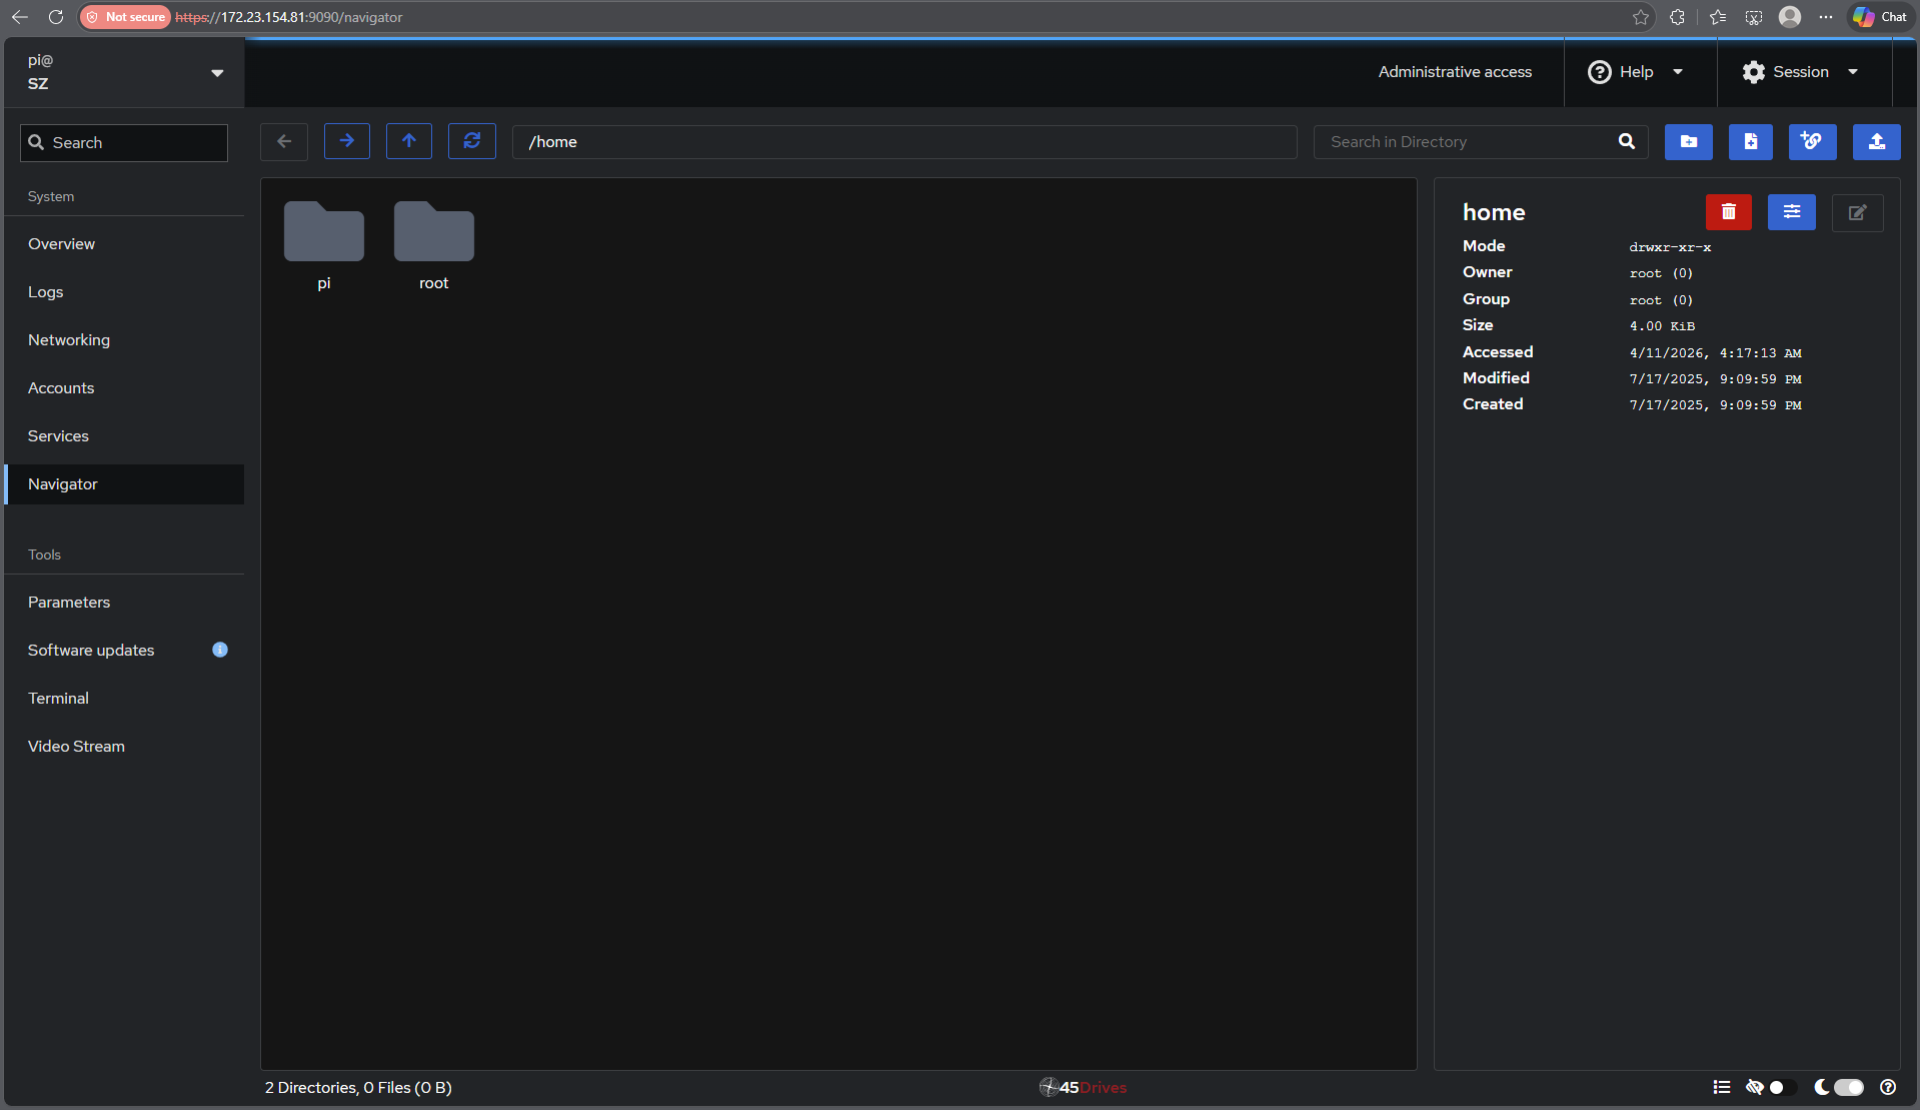
Default file viewer page
File viewer on WEB page helps maintain software and fix bugs in real camera systems. This page can be hidden for particular users.
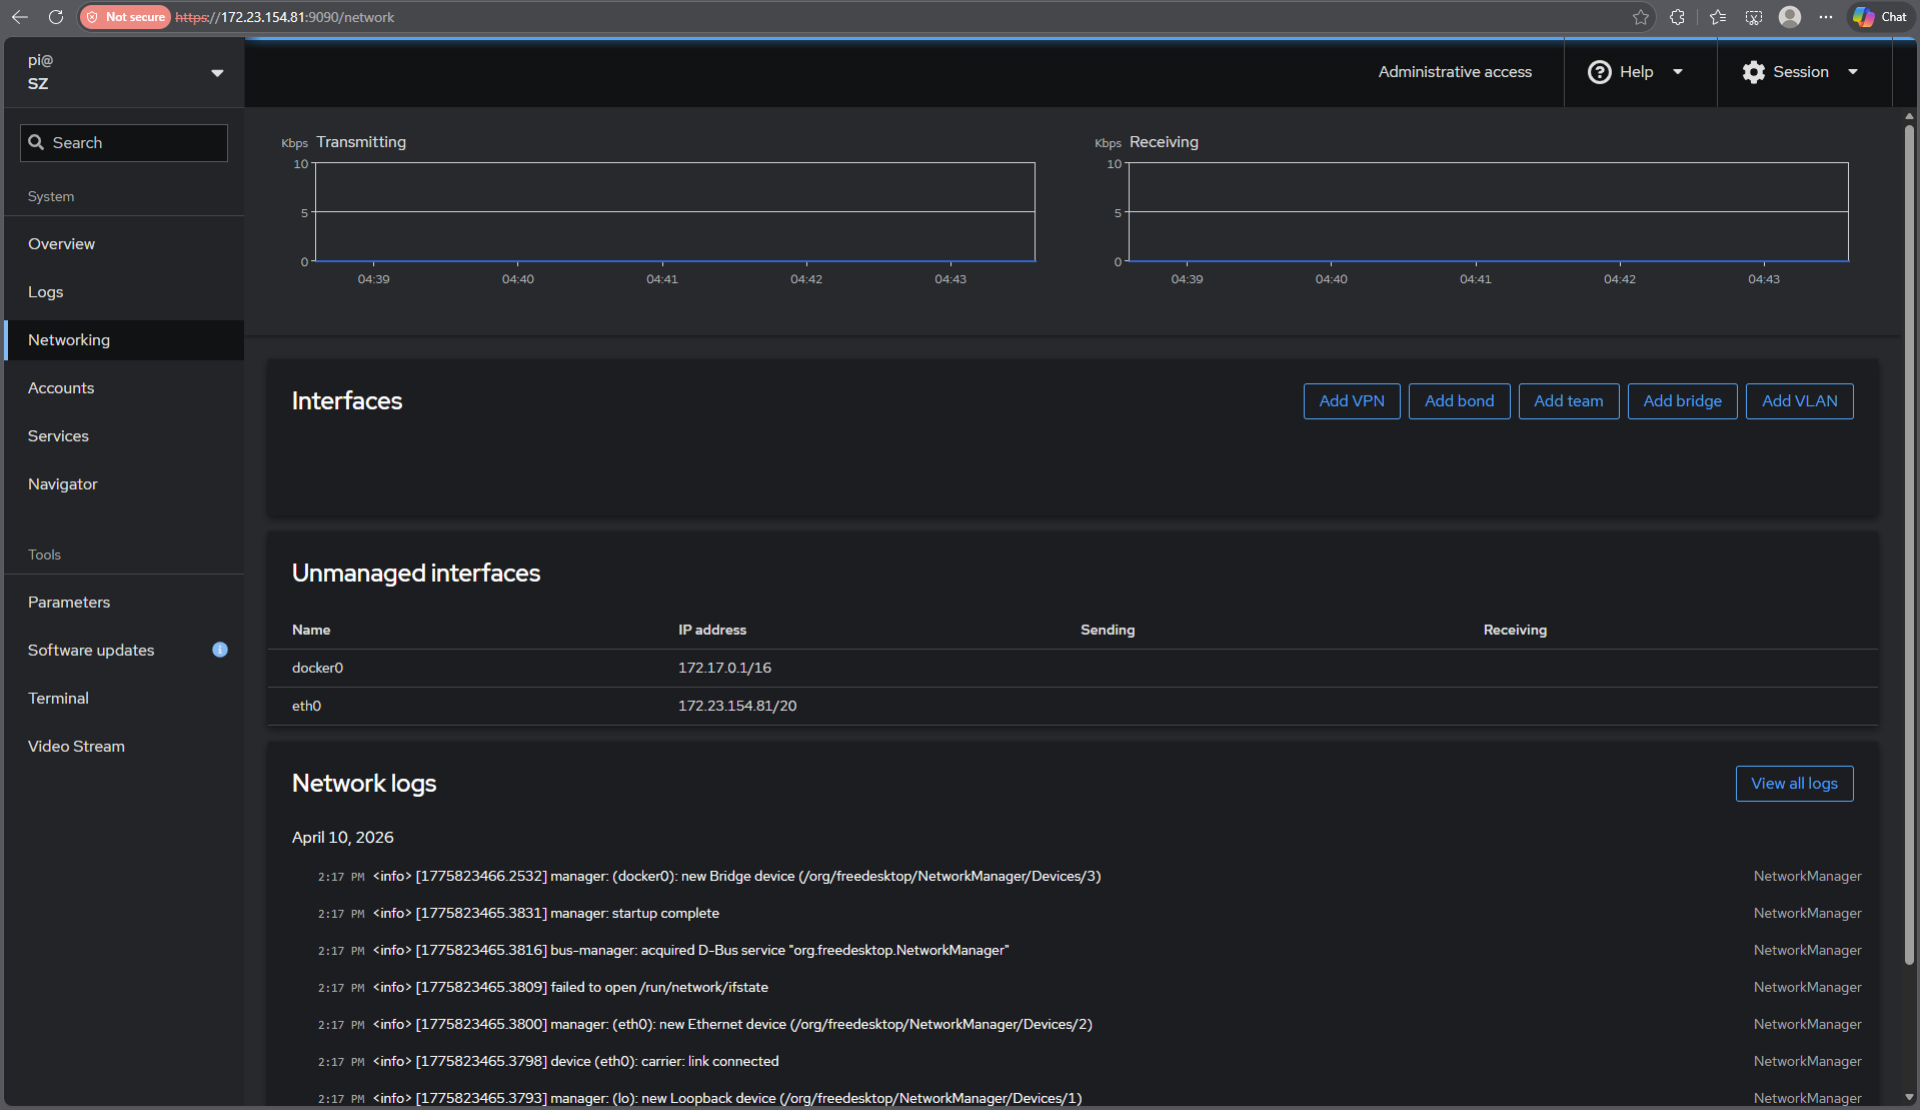
Default networks parameters page
This page provides network configuration. This page can be hidden for particular users.
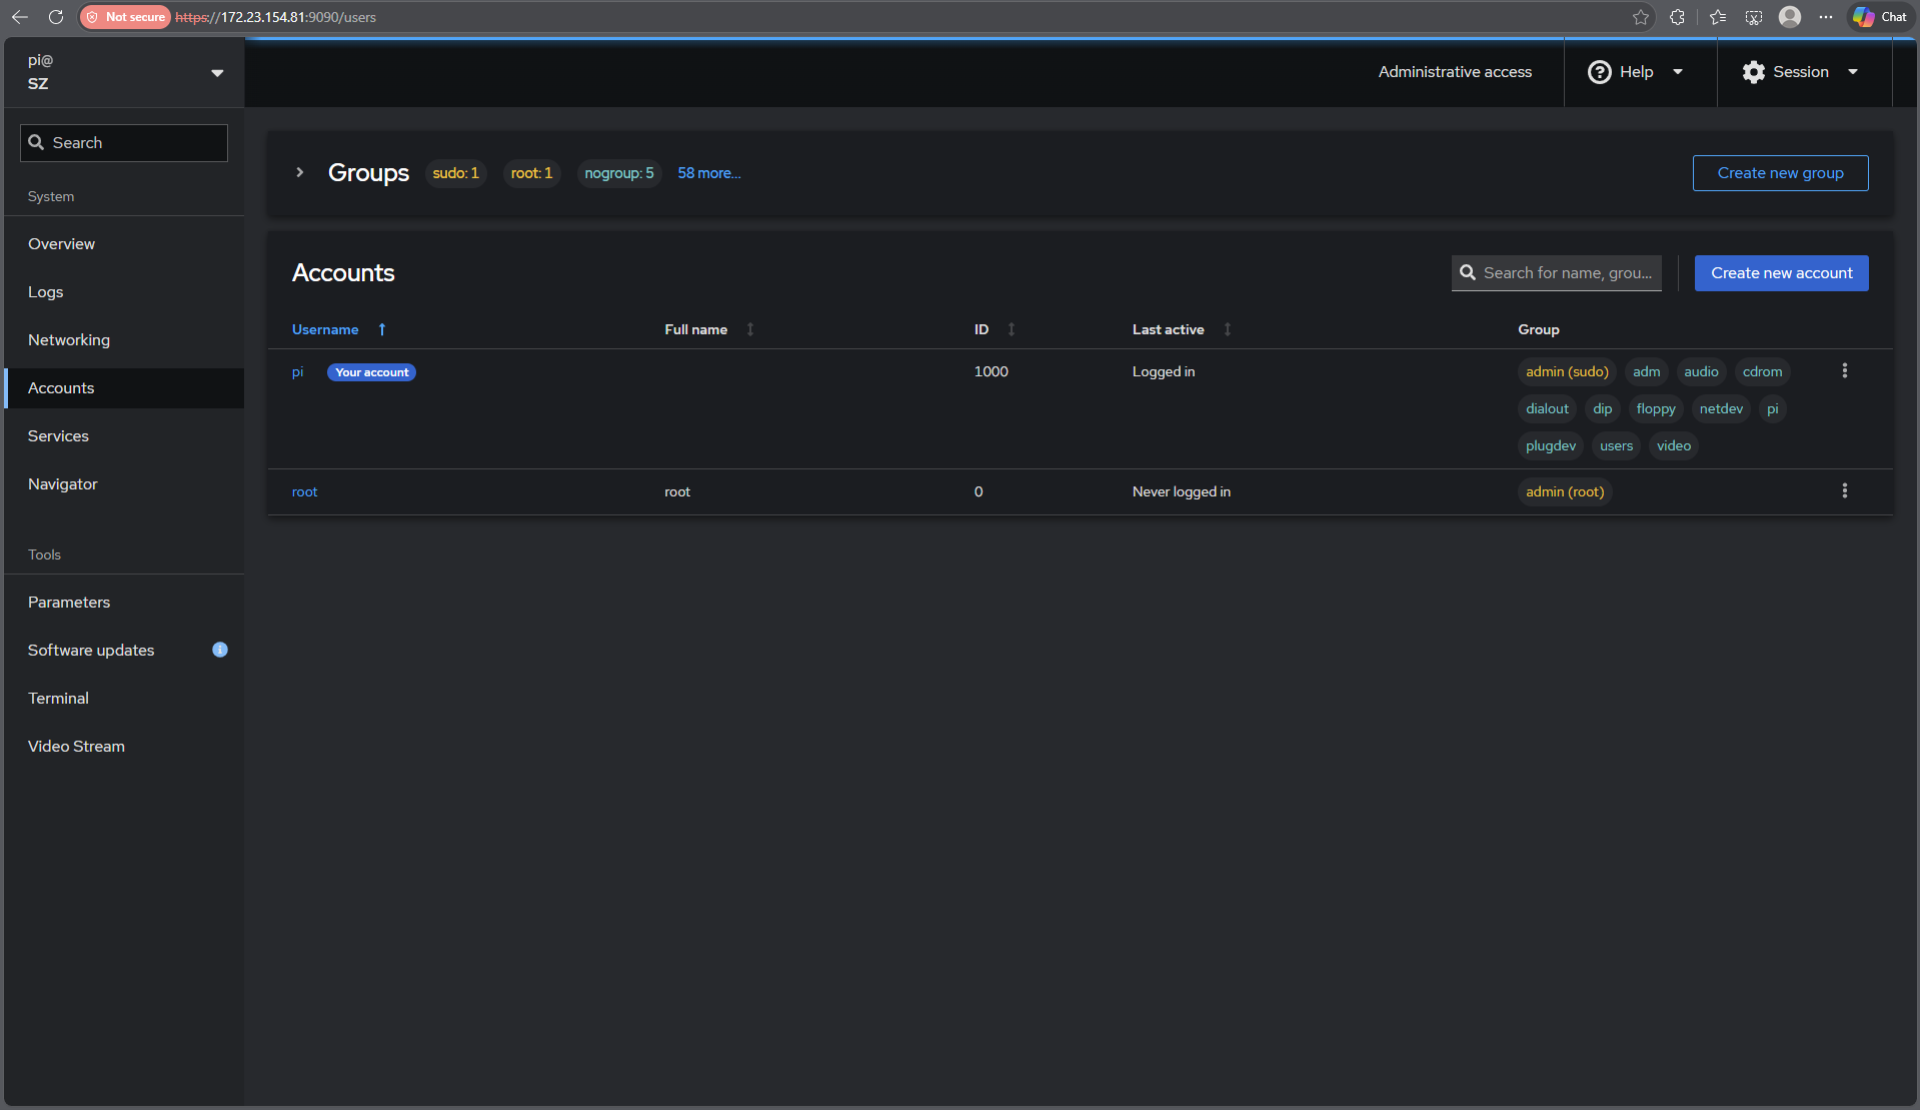
Default users management page
This page provides users configuration. This page can be hidden for particular users.
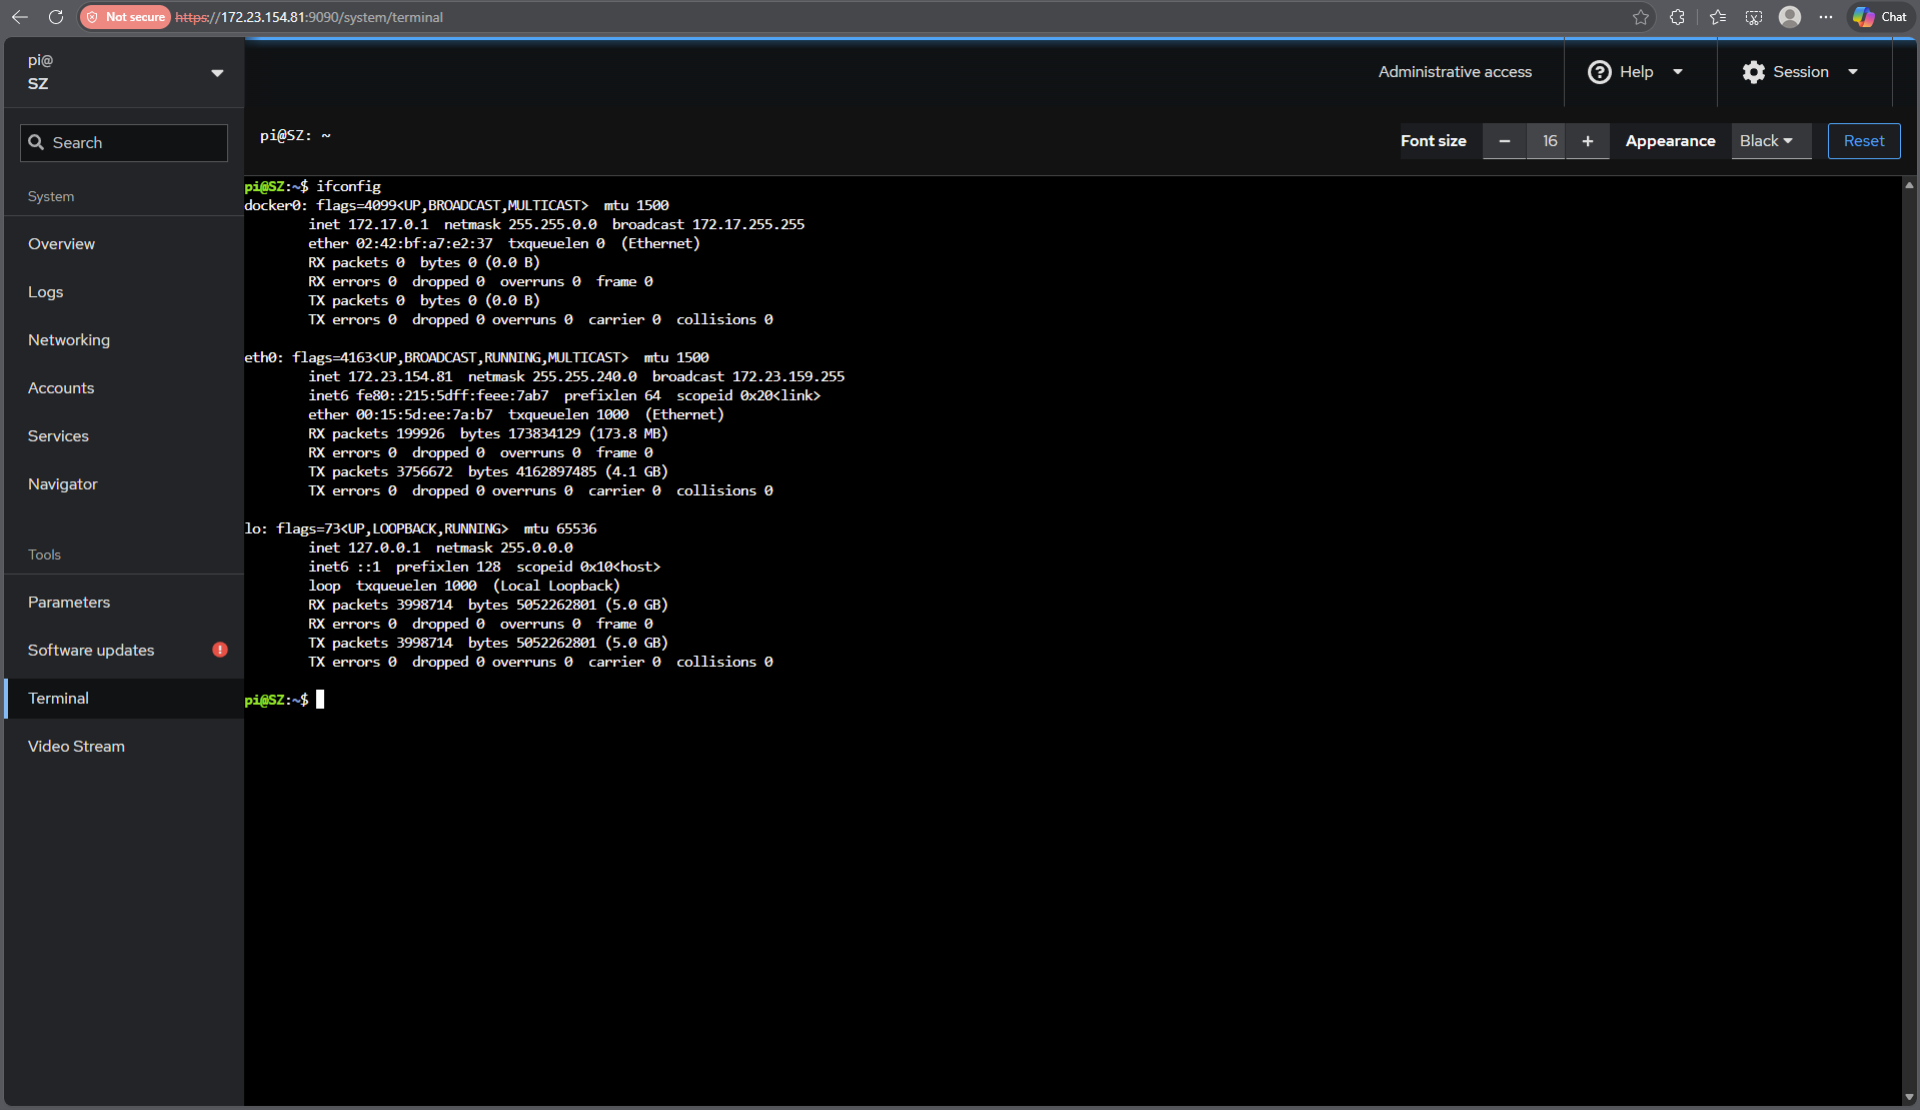
Default system terminal page
Linux terminal on WEB page is very important in case if SSH connection to the camera is prohibited (standard case). The user with administrative rights can get full control of the system without direct SSH connection.
Versions
Table 1 - Application versions.
| Version | Release date | What’s new |
|---|---|---|
| 1.0.0 | 12.04.2026 | - First version. |
| 1.0.1 | 25.04.2026 | - Updated installation instructions. |
| 1.0.2 | 20.06.2026 | - Updated parameters control according to new VStreamer interface. |
Source code files
The WebControlPanelTemplate includes source code only. The user would be given a set of files in the form of a CMake project (repository) and folder with WEB project. The repository structure is shown below:
CMakeLists.txt ----------------------- Main CMake file.
static ------------------------------- Folder with static files for documentation.
3rdparty ----------------------------- Folder with third-party libraries.
    CppHttpLib ----------------------- Folder with HTTP/HTTPS server library source code.
src ---------------------------------- Folder with application source code.
    CMakeLists.txt ------------------- CMake file.
    ApplicationConfig.h -------------- Main application configuration header file.
    ApplicationTemplateVersion.h.in -- File for CMake to generate version header.
    ApplicationTemplateVersion.h ----- Header file with application version.
    WebApplicationTemplateVersion.h -- Header file with WEB application version.
    ExternalControl.cpp -------------- External control source code file.
    WebControl.cpp ------------------- WEB server communication source code file.
    Utils.cpp ------------------------ Utils source code file.
    VideoOverlay.h ------------------- Custom video overlay header file.
    VideoOverlay.cpp ----------------- Custom video overlay implementation file.
    main.cpp ------------------------- Application source code file.
    WebTableContent.h ---------------- Header with custom parameters WEB page configuration.
WebControlPanel ---------------------- Folder with WEB control panel project files.
    branding ------------------------- Folder with files for WEB page branding.
    navigator ------------------------ Folder with file viewer addon files.
    public --------------------------- Folder with SVG icons.
    src ------------------------------ Folder with WEB project main source files.
    eslint.config.js ----------------- JS config file.
    install.sh ----------------------- Installation script.
    package-lock.json ---------------- JSON config file.
    package.json --------------------- JSON config file.
    parameters.html ------------------ HTML file for parameters display.
    postBuild.js --------------------- Service JS file.
    videostream.html ----------------- HTML code for video stream display.
    vite.config.js ------------------- Service JS file.
    vite.parameters.config.js -------- JS config file.
    vite.videostream.config.js ------- JS config file.
Principles of operation
The WebControlPanelTemplate includes two parts: WEB server systemd service and C++ application with video processing pipeline implementation. The user must build and install WEB server (see Build and install WEB server). Firstly the user installs Linux Cockpit and after install addons with custom parameters page and branding files. After start of WEB server systemd service it is available on URL: **https://

The template includes WEB server based on Linux Cockpit and ApplicationTemplate (C++ application). The WEB server is running as systemd service with addons for custom WEB page parameters and branding. The ApplicationTemplate can be run manually or in a different way. The ApplicationTemplate (C++ application) after start reads JSON config file and initializes video processing pipeline, video server and external UDP communication. The ApplicationTemplate communicates with WEB server using CppHttpLib library (provides HTTP/HTTPS server) and with external control user using UDP packets (UdpSocket library). After start WEB server tries to make HTTPS connection to the application. Once connection established the WEB server request from application custom WEB page configuration (/GetConfig request). The WEB page configuration is a JSON data (the JSON content is located in the WebTableContent.h file) which describes categories, parameters and possible values for video processing pipeline and video server. According to this configuration the WEB server dynamically creates WEB page content with necessary parameters to control video processing pipeline and server. After WEB page configuration WEB server periodically request parameters from the application (/GetParameters request). Parameters are JSON data which includes all current values for all parameters displayed on the custom WEB page. According to the data the WEB server fills WEB page with values. Also, periodically WEB server request parameters of WebRTC video stream (/GetVideoConfig request) to display video. The ApplicationTemplate after start initializes video processing pipeline (VPipeline library) and video server (VStreamerMediaMtx library). Note: the ApplicationTemplate doesn’t capture video from camera or file but it generates artificial video (1280x720, 30 FPS by default). After start the ApplicationTemplate wait commands from server (via HTTPS) and from external users via UDP (the commands UDP port is configurable in ApplicationConfig.json). When user changes any parameters on WEB page the WEB server sends command to ApplicationTemplate. When the application receives command from WEB server or from external user it decodes the command and executes it (ExternalControl.cpp file). New values of the parameters will be delivered to WEB server via /GetParameters requests.
Build ApplicationTemplate
Before building ApplicationTemplate it is necessary to install all dependencies. The following steps describe how to install all necessary dependencies (ubuntu Linux):
sudo apt-get update
sudo apt-get install -y build-essential cmake ffmpeg libavcodec-dev libavutil-dev libavformat-dev libavdevice-dev libavfilter-dev libcurl4 libopencv-dev libssl-dev
To build application run following commands:
cd RapidPixelSdk
mkdir build
cd build
cmake .. -DCMAKE_BUILD_TYPE=Release -DHTTPLIB_REQUIRE_OPENSSL=ON
make WebApplicationTemplate -j$(nproc)
On the first run, the application automatically creates the following files:
| File | Description |
|---|---|
| ApplicationConfig.json | Application configuration file |
| mediamtx.yml | MediaMTX configuration file |
| mediamtx | MediaMTX binary |
Run without sudo first (to create ApplicationConfig.json with correct permissions):
./build/bin/WebApplicationTemplate -v
Then run with sudo (required to read SSL certificates):
sudo ./build/bin/WebApplicationTemplate -v
After build procedure the application can be run from the command line. The following arguments can be used:
| Argument | Description |
|---|---|
| -v | Enable logger to print logs to console. |
| -p | Path for config file. For example : -p /home/pi |
When the application starts for the first time, it checks for the existence of a configuration file named ApplicationConfig.json. If the file is not found, the application automatically creates it. Since ApplicationTemplate requires root privileges, it is recommended to run the application for the first time without sudo. This prevents ApplicationConfig.json from being owned by the root user, ensuring proper access permissions.
Web Page Build Guide
Install Node.js and NPM
To build web pages, you need to have Node.js installed.
Note: Installing Node.js automatically includes npm — the Node.js package manager.
Check if Node.js is already installed:
node -v
npm -v
If not installed, use one of the following methods:
On macOS (with Homebrew):
brew install node
On Ubuntu/Debian:
curl -fsSL https://deb.nodesource.com/setup_lts.x | sudo -E bash -
sudo apt-get install -y nodejs
On Windows: Download and install Node.js from the official website:
https://nodejs.org/en/download/
Verify installation:
node -v
npm -v
Build the Project
Run the following commands from the cloned repository directory:
Install dependencies:
cd modules/ExamplesTemplates/WebControlPanelTemplate/WebControlPanel
npm install
WSL note: If
npmresolves to the Windows version, use:env -i HOME=/home/user PATH=/usr/local/bin:/usr/bin:/bin SHELL=/bin/bash USER=user /usr/bin/npm install
Build the release version:
npm run buildRelease
WSL note: If
npmresolves to the Windows version, use:env -i HOME=/home/user PATH=/usr/local/bin:/usr/bin:/bin SHELL=/bin/bash USER=user /usr/bin/npm run buildRelease
After building, the dist/ folder will contain the compiled pages and an install script. These files are archived as a .zip file in the release/ folder.
Install Cockpit
Update your package list:
sudo apt update
Install Cockpit:
sudo apt install cockpit
Start and enable Cockpit service
   sudo systemctl start cockpit
   sudo systemctl enable cockpit
Access the Cockpit web interface
Open your browser and navigate to:
https://<WSL_OR_DEVICE_IP>:9090
Replace <WSL_OR_DEVICE_IP> with your actual IP address.
To get your WSL IP address:
hostname -I | awk '{print $1}'
Note: If Cockpit opens in “limited access mode”, click “Turn on administrative access” and enter your password.
Install Web Page
Prerequisites: Ensure you have built the project using npm run buildRelease before proceeding.
Copy the contents of the dist/ folder to your WSL environment (or target device with Cockpit) and run the installation script:
cd dist
sudo chmod u+x install.sh
sudo ./install.sh
Open the Cockpit web interface:
https://<WSL_IP>:9090
Manual Installation
Alternatively, you can manually install the plugin by copying the contents of the dist/ folder (the parameters and videostream folders) to:
/home/<user>/.local/share/cockpit
Note: Replace <user> with the actual username. The user must have appropriate permissions to access Cockpit.
If the tab should be available to all users, copy the contents (the parameters and videostream folders) to /usr/share/cockpit.
Troubleshooting
Common Issues
- Permission denied when running install.sh:
sudo chmod +x install.sh - Cockpit not accessible:
- Check if the service is running:
sudo systemctl status cockpit - Verify firewall settings:
sudo ufw status - Ensure port 9090 is open:
sudo ufw allow 9090
- Check if the service is running:
- Build fails with npm errors:
- Clear npm cache:
npm cache clean --force - Delete node_modules and reinstall:
rm -rf node_modules && npm install
- Clear npm cache:
HTTP API Documentation
This document describes the available HTTP API endpoints for interacting with the WebControl application.
Base URL
All API endpoints are relative to the WebControl application’s base URL:
http://<DEVICE_IP>:<PORT>
Replace <DEVICE_IP> and <PORT> with the actual IP address and port of your WebControl device.
GetConfig
Type: GET
Endpoint: /GetConfig
Description: Returns a JSON object with the configuration parameters. The structure corresponds to webconfig.json (see Parameters Configuration).
Example Response:
{
    "label": "PARAMETERS TAB LABEL",
    "groups": [
        {
            "label": "GROUP LABEL",
            "settings": [
                {Parameter #1 descriptor},
                {Parameter #2 descriptor}
            ]
        }
    ]
}
Response Codes:
- 200 OK: Configuration retrieved successfully
- 500 Internal Server Error: Failed to retrieve configuration
GetParameters
Type: GET
Endpoint: /GetParameters
Description: Returns a JSON object with current device parameters. This endpoint is intended to be polled or streamed at a rate of 2 times per second.
Example Response:
{
  "WebParams": {
    "VideoSource": {
      ...
    },
    "VideoTracker": {
      ...
    },
    "VideoStabilizer": {
      ...
    },
    "MotionDetector": {
      ...
    },
    "ChangesDetector": {
      ...
    },
    "ImageFlip": {
      ...
    },
    "DigitalZoom": {
      ...
    },
    "ColorProcessor": {
      ...
    },
    "Dehazer": {
      ...
    },
    "Denoiser": {
      ...
    },
    "MotionMag": {
      ...
    },
    "VideoServer": {
      ...
    },
    "General": {
      ...
    }
  }
}
Notes:
- Keys correspond to parameter paths as defined in the configuration.
- Values reflect the current state of each parameter.
- The response may include additional or fewer fields depending on the device configuration.
Response Codes:
- 200 OK: Parameters retrieved successfully
- 500 Internal Server Error: Failed to retrieve parameters
Command
Type: POST
Endpoint: /Command
Description: Sends a command to control the device.
Request Body:
{
  "Command": "MotionDetector/Mode",
  "Value": "0"
}
Parameters:
Command— Path to the command or setting.Value— Desired value to apply.
Response:
- 200 OK: Command executed successfully
- 400 Bad Request: Invalid command or value
- 500 Internal Server Error: Command execution failed
GetVideoConfig
Type: GET
Endpoint: /GetVideoConfig
Description: Returns the video stream configuration.
Example Response:
{
  "url": "",
  "username": "",
  "userpass": ""
}
Response Codes:
- 200 OK: Video configuration retrieved successfully
- 500 Internal Server Error: Failed to retrieve video configuration
Parameters Configuration
General Structure
Each group is a collapsible list of parameters. Parameter descriptors are described within the groups.
{
    "label": "PARAMETERS TAB LABEL",
    "groups": [
        {
            "label": "GROUP LABEL",
            "settings": [
                {Parameter #1 descriptor},
                {Parameter #2 descriptor}
                ...
            ]
        }
        ...
    ]
}
Dropdown List
Standard dropdown list with option selection. Displays label, sends value.
{
    "name": "Camera/Profile",               // Reading and writing name
    "label": "Scene Modes",                 // Label in Web UI
    "description": "Scene Modes",           // Description, displayed when hovering over the label
    "access": "READ_WRITE",                 // Access: READ_WRITE or READ_ONLY
    "visualisation": "DROPDOWN",            // Visualisation type
    "type": "ENUM",                         // Value type. "ENUM" for "DROPDOWN"
    "enumValues": [                         // Dropdown options
        {
            "label": "Day Mode",            // Option 1 label
            "value": "0"                    // Option 1 value
        },
        {
            "label": "Day Mode + Fog",      // Option 2 label
            "value": "1"                    // Option 2 value
        }
    ]
}
Text Field
String input field.
{
    "name": "Video/StreamName",            // Reading and writing name
    "label": "RTSP stream name",           // Label in Web UI
    "description": "RTSP stream name",     // Description, displayed when hovering over the label
    "access": "READ_ONLY",                 // Access: READ_WRITE or READ_ONLY
    "visualisation": "TEXT_FIELD",         // Visualisation type
    "type": "STRING"                       // Value type. "STRING" for "TEXT_FIELD"
}
On/Off Switch
Toggles a boolean value.
{
    "name": "CorrectPosition",              // Reading and writing name
    "label": "Correct position",            // Label in Web UI
    "description": "On/Off correction",     // Description, displayed when hovering over the label
    "access": "READ_WRITE",                 // Access: READ_WRITE or READ_ONLY
    "visualisation": "SWITCH",              // Visualisation type
    "type": "BOOL"                          // Value type. "BOOL" for "SWITCH"
}
Input Number
Input field for a number (integer or floating point).
{
    "name": "RollCorrection/Angle",         // Reading and writing name
    "label": "Angle",                       // Label in Web UI
    "description": "Angle * 1000",          // Description, displayed when hovering over the label
    "access": "READ_WRITE",                 // Access: READ_WRITE or READ_ONLY
    "visualisation": "INPUT_NUMBER",        // Visualisation type
    "type": "INT",                          // Value type. "INT" or "FLOAT"
    "min": -10000,                          // Minimum value
    "max": 10000                            // Maximum value
}
Command Button
A button that, when pressed, sends the required command.
{
    "name": "Camera/Menu:On",               // Command string
    "label": "Camera menu On",              // Label in Web UI
    "description": "Camera menu On",        // Description, displayed when hovering over the label
    "visualisation": "COMMAND_BUTTON",      // Visualisation type
    "type": "COMMAND",                      // Value type. "COMMAND" for "COMMAND_BUTTON"
    "buttonText": "ON"                      // Label on button
}
Push/Release Button
A button that sends one command when pressed and another when released.
{
    "label": "Push Release button",         // Label in Web UI
    "description": "Test Push/Release",     // Description, displayed when hovering over the label
    "visualisation": "PUSH_RELEASE_BUTTON", // Visualisation type
    "type": "COMMAND",                      // Value type. "COMMAND" for "PUSH_RELEASE_BUTTON"
    "push": "Camera/TestPushCommand",       // The command sent when the button is pressed
    "release": "Camera/TestReleaseCommand", // Command sent when the button is released
    "buttonText": "PUSH/RELEASE"            // Label on button
}
Slider
Allows you to smoothly adjust numeric values.
{
    "name": "Camera/Timeout",               // Reading and writing name
    "label": "Camera timeout, sec",         // Label in Web UI
    "description": "Camera timeout, sec",   // Description, displayed when hovering over the label
    "access": "READ_WRITE",                 // Access: READ_WRITE or READ_ONLY
    "visualisation": "SLIDER",              // Visualisation type
    "type": "INT",                          // Value type. "INT" or "FLOAT"
    "min": 0,                               // Minimum value
    "max": 100                              // Maximum value
}
Divider
Visual separator for parameters within a group.
{
    "label": "Test Divider",                // Label in Web UI
    "description": "Test divider",          // Description, displayed when hovering over the label
    "visualisation": "DIVIDER"              // Visualisation type
}
File Viewer Installation
The cockpit-navigator plugin is used as a file viewer.
Repository link:
https://github.com/45Drives/cockpit-navigator
Automatic Installation
The plugin is installed automatically when running the main install.sh script.
Manual Installation for Ubuntu (from GitHub Release)
wget https://github.com/45Drives/cockpit-navigator/releases/download/v0.5.10/cockpit-navigator_0.5.10-1focal_all.deb
sudo apt install ./cockpit-navigator_0.5.10-1focal_all.deb
Installation from Source
Install dependencies: Make sure the following dependencies are installed: cockpit, python3, rsync, and zip.
sudo apt install cockpit python3 rsync zip
Clone and build:
   git clone https://github.com/45Drives/cockpit-navigator.git
   cd cockpit-navigator
   git checkout v0.5.10  # Use the latest stable version
   sudo make install
Limited Access User
Cockpit tab management system
Cockpit tabs are implemented as plugins. A plugin is a directory that contains HTML pages for the tabs and a configuration file manifest.json. The web interface displays tabs from all installed plugins in the left-hand menu.
Installing a plugin is done by copying the plugin directory to one of the following locations:
/usr/share/cockpit— the plugin is available to all users./home/USER_NAME/.local/share/cockpit— the plugin is available only to the specific userUSER_NAME.
Some plugins can contain multiple tabs (for example, the standard systemd plugin provides the System, Terminal, Services, and Logs tabs). In such cases the set of displayed tabs is controlled by editing the manifest.json file. The manifest.json file defines tab entries under the "menu" or "tools" sections.
If you remove tab entries from manifest.json, they will disappear from the web interface. However, direct links to removed tabs may still work in the browser. To fully disable access you must also delete the associated .html, .css, and .js files.
WebControlWeb User Access Control System
Built on top of Cockpit’s tab management, WebControlWeb implements the following user access control model:
- The system assumes a single administrator user with full privileges and multiple regular users with restricted access.
- The administrator has access to the full set of tabs (Terminal, System updates, Network settings, User management, etc.).
- A regular user has a limited set of tabs (Overview, Logs, a file viewer scoped to the user’s directory, video viewing, and camera parameter editing).
- The
Video streamandParameterstabs are available to all users. - The administrator is the user account under which the
install.shscript was executed during installation. - From the
Accountssection an administrator can create any number of users. Each newly created user will automatically receive the limited set of tabs.
Detailed description of the internal user access organization
All actions described in this section are performed by the install.sh script.
By default Cockpit exposes a full set of pages to all users. All plugins that provide these pages are located in /usr/share/cockpit.
Step 1 — Backup and remove default plugins
First, all directories from /usr/share/cockpit are copied to /usr/share/cockpit-backup and then removed from /usr/share/cockpit. The backup of plugins will be used later to restore tabs. After this step the web interface will become unavailable.
Step 2 — Restore minimal system directories
After completely clearing /usr/share/cockpit, move the required system directories static, branding, shell, and base1 from /usr/share/cockpit-backup back into /usr/share/cockpit.
At this stage the web interface will accept logins (authentication), but no tabs will be displayed after authentication.
Step 3 — Add plugins per user
To add tabs back, copy the plugin directories you want from /usr/share/cockpit-backup into the specific user’s directory /home/USER_NAME/.local/share/cockpit.
-
For the administrator (the user account that executed
install.sh), copy thenetworkmanager,packagekit,systemd(unchanged), andusersdirectories from/usr/share/cockpit-backup. -
For a regular user: to provide only the
OverviewandLogstabs, copy only thesystemddirectory from/usr/share/cockpit-backup. Because thesystemdplugin also contains functionality for service management and a terminal — which are not desired for regular users — after copying you must editmanifest.jsonto remove theservicesobject from themenusection and theterminalobject from thetoolssection. You must also delete any.html,.js, and.cssfiles namedservicesandterminal(for example,services.html,services.js,services.css,terminal.html, etc.).
After this operation the Overview and Logs tabs will be available for the specific user, and the Services and Terminal tabs will not be available.
Automation restriction tabs for new users via /etc/skel
To automate this process, perform the adjusted copy once in /etc/skel/.local/share/cockpit: edit manifest.json and remove everything related to terminal and services. When a new user is created, the contents of /etc/skel/.local/share/cockpit will be copied automatically to /home/USER_NAME/.local/share/cockpit.
Step 4 — Shared pages
The Video stream and Parameters pages are common to all users and therefore may be copied into /usr/share/cockpit so they are available system-wide.
Examples
Example 1: Manual restriction all tabs
1. Backup the Full Cockpit Directory
Copy all contents of the /usr/share/cockpit directory to /usr/share/cockpit-backup
sudo cp -rf /usr/share/cockpit /usr/share/cockpit-backup
2. Remove plugins from shared folder
Clear Cockpit Plugins Directory
sudo rm -rf /usr/share/cockpit/*
3. Restore base folders from backup
Copy the following folders from /usr/share/cockpit-backup to /usr/share/cockpit :
/static/branding/shell/base1
sudo cp -rf /usr/share/cockpit-backup/static /usr/share/cockpit
sudo cp -rf /usr/share/cockpit-backup/branding /usr/share/cockpit
sudo cp -rf /usr/share/cockpit-backup/shell /usr/share/cockpit
sudo cp -rf /usr/share/cockpit-backup/base1 /usr/share/cockpit
At this point no one will see any tabs in the web browser.
Example 2: Adding shared tabs Video stream and Parameters for all users
Copy the following folders from dist folder after building this project to /usr/share/cockpit:
/parameters/videostream
sudo cp -rf parameters /usr/share/cockpit
sudo cp -rf videostream /usr/share/cockpit
Example 3: Admin with All Tabs
For the admin user, copy the following folders from /usr/share/cockpit-backup to /home/admin/.local/share/cockpit:
/networkmanager/packagekit/systemd/users
sudo mkdir -p /home/admin/.local/share/cockpit
sudo cp -r /usr/share/cockpit-backup/networkmanager /home/admin/.local/share/cockpit/
sudo cp -r /usr/share/cockpit-backup/packagekit /home/admin/.local/share/cockpit/
sudo cp -r /usr/share/cockpit-backup/systemd /home/admin/.local/share/cockpit/
sudo cp -r /usr/share/cockpit-backup/users /home/admin/.local/share/cockpit/
Example 4: User with a Limited Set of Tabs
Create a new user user through the web interface by logging in as admin and using the Accounts tab.
4a. Restore a Limited Set of Tabs for user
For the regular user account, copy the following from /usr/share/cockpit-backup to /home/user/.local/share/cockpit:
/systemd
mkdir -p /home/user/.local/share/cockpit
cp -r /usr/share/cockpit-backup/systemd /home/user/.local/share/cockpit/
4b. Customize manifest.json and Remove Extra Files
Inside /home/user/.local/share/cockpit/systemd:
- Edit
manifest.json:- Remove the
"services"object from the"menu"section - Remove the
"terminal"object from the"tools"section
- Remove the
- Delete the following files:
terminal.css.gzterminal.html.gzterminal.js.gzservices.css.gzservices.html.gzservices.js.gz
sudo rm terminal.css.gz
sudo rm terminal.html.gz
sudo rm terminal.js.gz
sudo rm services.css.gz
sudo rm services.html.gz
sudo rm services.js.gz
At this point, the
userwill only see a limited set of tabs.
UI Branding Customization
All customization changes are installed by running install.sh.
Changing the Brand Name

Edit the existing content for #brand:before in the /branding/ubuntu/branding.css file in the repository:
#brand:before {
    content: "Your brand name";
}
Note:
Path to file after installation:
/usr/share/cockpit/branding/ubuntu/branding.css
Changing the Logo
![]()
Replace the file /branding/ubuntu/logo.png in the repository with your logo image.
Update the size in the #badge section in /branding/ubuntu/branding.css:
#badge {
    width: 378px;
    height: 181px;
    background-image: url("logo.png");
    background-size: contain;
    background-repeat: no-repeat;
}
Note:
Path to files after installation:
/usr/share/cockpit/branding/ubuntu/logo.png
/usr/share/cockpit/branding/ubuntu/branding.css
Changing the Background Image

Replace the file /branding/default/bg-plain.png in the repository with your background image.
Note:
Path to file after installation:
/usr/share/cockpit/branding/default/bg-plain.png
Changing the Favicon Image

Replace the following files in the repository with your favicon image:
/branding/ubuntu/favicon.ico/branding/default/favicon.ico/branding/default/apple-touch-icon.png
Note:
Path to files after installation:
/usr/share/cockpit/branding/ubuntu/favicon.ico
/usr/share/cockpit/branding/default/favicon.ico
/usr/share/cockpit/branding/default/apple-touch-icon.png
Changing Colors
Colors on login and other pages can be redefined by changing the /branding/ubuntu/branding.css file in the repository.
To customize colors:
- Use browser developer tools to inspect the DOM elements you want to modify
- Identify the element’s ID (using
#) or CSS class (using.) - Add the appropriate CSS rules to the
branding.cssfile
Example:
/* Change login button color */
#login-button {
    background-color: #your-color;
}

/* Change header background */
.cockpit-header {
    background-color: #your-color;
}
External control protocol
Overview
String Control Protocol is a protocol that allows external systems to control the ApplicationTemplate and receive data from it. It utilizes UDP communication, where ApplicationTemplate system listens on a specific UDP port and returns responses to incoming messages. The implementation of the external control protocol in the file src/ExternalControl.cpp. Key Features:
- Human-Readable Commands: It uses a clear, string-based format, making it easily interpretable without additional processing.
- Unique Message Identifiers: Every request and response carries a unique identifier, enabling precise tracking of messages.
- Message Types:
- Command: Instructs functional modules to perform specific tasks or modify settings.
- Request: Requests real-time values of system parameters.
- Response: Replies from ApplicationTemplate containing requested parameter values.
- Ack: Acknowledgments, confirms successful execution of a command or parameter update.
- Nack: Negative Acknowledgments, indicates an invalid or rejected command.
- Client-Initiated Communication: The protocol follows a strict request-response model, meaning ApplicationTemplate does not send messages autonomously but instead responds exclusively to external requests.
- Dynamic Message Routing: It directs messages to different subsystems based on configuration, accommodating various hardware architectures:
- A unified control unit handling all camera operations.
- A main processing unit linked to dedicated camera control boards.
- A system with multiple camera payload modules.
- Hybrid setups incorporating camera and other non-optical modules.
- Multi-Client Support: Multiple clients can interact with the ApplicationTemplate system concurrently. The protocol ensures that responses are directed to the appropriate client based on its network details, allowing clients to establish communication over any designated UDP port.
Messages
The messages follow a structured format:
[N]/<MessageType>/<Module>/<Parameter Name or Action Command>[:Optionally parameter value to set]
- [N] represents the unique identifier assigned to each message. This ensures that responses are correctly linked to the originating request, allowing the system to direct replies to the appropriate client.
-
specifies the type of message, chosen from the following predefined categories: **Command**, **Request**, **Response**, **Ack**, **Nack**. -
designates the target module or device that should process the request. A full list of available modules is provided in **Table 3.2**. -
refers to the specific setting being adjusted (accompanied by a value after ‘:’) or an executable action command. The parameters and commands available depend on the selected module.
Table 3.1 - Types of messages (all messages start with this keywords after [N]/):
| Message Type | Description |
|---|---|
| Command | Sent from the Client to ApplicationTemplate platform. Used to execute an action or change a parameter in any module. |
| Request | Sent from the Client to ApplicationTemplate. Used to request the value of a parameter of particular module. |
| Response | Sent from ApplicationTemplate to the Client. Response to a valid Request message, including the requested parameter value. |
| Ack | Sent from system to the Client. Response to a valid Command message, indicating the command was executed or accepted. |
| Nack | Sent from system to the Client. Response to an invalid Command or Request message. |
Table 3.2 - All ApplicationTemplate modules, field **
| Module | Description |
|---|---|
| VideoSource | Video source module providing frames. |
| VideoStabiliser | Video stabiliser module. |
| MotionDetector | Motion detector module. |
| ChangesDetector | Changes detector module. |
| DigitalZoom | Digital zoom module. |
| Dehazer | Dehazer module. |
| Denoiser | Denoiser module. |
| ImageFlip | Image flip module. |
| ColorProcessor | Color processor module. |
| MotionMagnificator | Motion magnification. |
| VideoTracker | Video tracker module. |
| VideoServer | Video server. |
| General | General. |
Examples of messages:
[client -> system] [6]/Command/VideoTracker/Reset - Reset video tracking.
[system -> client] [6]/Ack - command accepted.
[client -> system] [7]/Command/VideoTracker/CapturePercents:20.4x36.7 - Capture object with position 20.4% from video width and 36.7% from video height.
[system -> client] [7]/Ack - command accepted.
[client -> system] [8]/Request/VideoTracker/Mode - Request video tracker mode.
[system -> client] [8]/Response/VideoTracker/Mode:0 - FREE video tracker mode.
[client -> system] [9]/Command/VideoStabiliser/Reset - Reset video stabilizer.
[system -> client] [9]/Ack - Command accepted.
[client -> system] [10]/Command/VideoStabiliser/TransparentBorderMode:1 - Set transparent border for stabilization.
[system -> client] [10]/Ack - Command accepted.
[client -> system] [11]/Request/VideoStabiliser/Mode - Request video stabilizer.
[system -> client] [11]/Response/VideoStabiliser/Mode:1 - Response about stabilizer.
[client -> system] [12]/Command/MotionDetector/Reset - Reset motion detector.
[system -> client] [12]/Ack - Command accepted.
[client -> system] [13]/Command/MotionDetector/MaxObjectWidth:100 - Set maximum object width 100 pixels for motion detection.
[system -> client] [13]/Ack - Command accepted.
[client -> system] [14]/Request/MotionDetector/Mode - Request motion detector mode.
[system -> client] [14]/Response/MotionDetector/Mode:1 - Response about motion detector mode.